OpenELEC instalation
Required:
- SD card 8GB class 6 or more
- HDMI cables with CEC support
- Ethernet cable for internet access
- Power supply 5V with micro USB for first time configuration, or use TV USB HDD 1A connector
Install OpenELEC image to SD card using Windows PC:
- put blank SD card to your SD card reader on PC
- donwload and install Win32DiskImager
- download lates OpenELEC Raspberry PI Diskimage from OpenELEC web page and unpack it from .gz to .img
- run Win32DiskImager as administrator and select image file and drive letter of the SD card
- click Write and wait for the write to complete
- exit imager and eject the SD card
Prepare to start:
- plug SD card on Raspberry Pi SD card slot
- plug USB keyboard into USB slots on the Raspberry Pi
- make sure that your monitor or TV is turned on and connected to Raspberry Pi via HDMI
- plug ethernet cable
- plug 5V micro usb power supply – this action will turn on and boot Raspberry Pi into OpenELEC
- enable HDMI CEC on your TV
For Samsung TV you can enable that in Menu -> System -> Anynet+ (HDMI-CEC):
Anynet+ (HDMI-CEC): On
Automatically turn off: No
Devices: select XBMC
Note: You can plug power supply from your TV USB (min. 1A out) to Raspberry Pi,
but when power it's not enought warning icons on your TV screen it's show:
* Red square icon on top right TV screen is CPU over-temperature
* Rainbow square icon on top right TV screen is under-voltage
You need more mA Power Supply.
Update OpenELEC to latest version:
– Menu -> System -> OpenELEC -> System
Updates -> Check for updates now
Buy license keys to enable GPU hardware decoding MPG2 and WVC1
Obtain your Raspberry Pi's serial number:
|
1 2 3 4 5 6 7 8 9 10 11 12 13 14 |
ssh root@openelec cat /proc/cpuinfo | grep Serial processor : 0 model name : ARMv6-compatible processor rev 7 (v6l) Features : swp half thumb fastmult vfp edsp java tls CPU implementer : 0x41 CPU architecture: 7 CPU variant : 0x0 CPU part : 0xb76 CPU revision : 7 Hardware : BCM2708 Revision : 0010 Serial : 0000000012345678 |
Purchase your licences:
http://www.raspberrypi.com/
The Raspberry Pi foundation will email your licence codes to you.
Enabling the licences without removing the SD card from the Raspberry Pi:
|
1 2 |
mount /flash -o remount,rw nano /flash/config.txt |
|
1 2 3 |
# decode_WVC1=0x00000000 # decode_DTS=0x00000000 # decode_DDP=0x00000000 |
To enable the MPG2 licence you need to do two things:
1/ Replace 0x00000000 with the licence key you received via email.
2/ Remove the # and space from the relevant line
Once you have made your changes press CTRL and X on your keyboard,
nano will ask if you want to save the changes, press Y on your keyboard then Enter,
if you recieve an error that the file is read only try the remount command again.
To make sure the changes are written to the SD card type:
|
1 |
sync |
Then remount the file system as read only:
|
1 |
mount /flash -o remount,ro |
Finally reboot the Raspberry Pi either from the menu in XBMC or typing:
|
1 |
reboot |
After the Raspberry Pi has rebooted you should be able to play content using the hardware decoders.
Test if it's enabled:
|
1 2 |
vcgencmd codec_enabled MPG2 vcgencmd codec_enabled WVC1 |
If MPG2 or WVC1 has been successfully enabled it should return something similar to this:
MPG2=enabled
If it returns disabled you will need to check:
You entered the correct serial number when purchasing the licence.
You have correctly added the licence key to the config.txt file.
You uncommented the relevant lines in the config.txt file by removing the # and space from the start of the line.
You have rebooted before testing.
OpenELEC – Configuration
First time configuration
– Menu -> System -> OpenELEC -> Connections
Select Wired Network -> Edit
Connection:
Connect Automatically: [x]
IPv4:
IP Address Method: manual
IP Address, Subnet Mask, Default Gateway: your network
IPv6:
IP Address Method: off
DNS Servers:
Nameserver #1: your DNS server IP
– Menu -> System -> OpenELEC -> Services
Samba
* Enable Samba [ ] # We don't need it on Raspberry Pi
SSH
* Enable SSH [x]
* Disable SSH Password [ ]
Avahi
* Enable Avaho (Zeroconf) [ ]
Cron
* Enable Cron [x]
Driver
* Enable LCD Driver Support [ ]
Bluetooth
* Enable Bluetooth [ ]
– Menu -> System -> Settings -> Video
Acceleration
Decoding method
– Menu -> System -> Settings -> Music
* For me not used (I use Yamaha Receiver to play music from server)
– Menu -> System -> Settings -> Pictures
– Menu -> System -> Settings -> Appearance [Settings level Expert]
Skin: Confluence (Default skin)
Appearance
* Show RSS news feeds [ ] # Disable RSS bottom line
International
* Language: English
* Region: Central Europe
* Character set: Central Europe (Windows) # For DVB Link Server
* Timezone country: your country
File lists
* Show parent folder items [x]
* Show file extensions [x]
* Ignore articles when sorting (e.g. "the") [x]
* Allow file renaming and deletion [ ]
* Show "Add source" buttons in file lists [x]
* Show hidden files and directories [ ]
* Support browsing into archivers [ ]
Screensaver # Set our photo's as screensaver slideshow
* Click on Screensaver mode -> Get More…
Select "Slideshow" or "Multi Slideshow Screensaver" and install it
* Go back one level and select our newly installed Screensaver as Screensaver mode
* Set additional settings for this screensaver
– Menu -> System -> Settings -> Live TV
General
* Enabled [x]
* Synchronise channel groups with backend(s) [x]
EPG
* Default select action: Switch to channel
Playback
* Start playback minimised [ ]
* Continue last channel on startup [No]
* Confirm channel switches by pressing OK [ ]
TV Remote customization (Samsung Smart TV remote):
– To check what do all remote buttons we need enable debug logging:
System -> Settings -> System -> Debugging -> Enable debug logging [x]
– Connect to Raspberry Pi via SSH and write command:
tail -F /storage/.xbmc/temp/xbmc.log | grep OnKey
– Now push some TV remote buttons and watch what message it's show on SSH.
So we can get for every button right XBMC button/action
– Download original remote mapping from:
/usr/share/xbmc/system/keymaps/remote.xml
– after editing remote.xml upload it into:
/storage/.xbmc/userdata/keymaps/remote.xml
– reboot Raspberry Pi with
OpenELEC – Tweaks to improve XBMC performance on Raspberry Pi
Overclock Raspberry Pi:
The procedure is very simple, you just need to access your SD card from a pc and modify a text file.
We can modify this text file via SSH – using nano text editor:
|
1 2 |
mount /flash -o remount,rw nano /flash/config.txt |
Here uncomment the four lines (arm_freq, core_freq, sdram_freq and over_voltage) and change their values
with the ones taken from the comments you find just before them. My good overclocking settings are:
|
1 2 3 4 5 6 |
arm_freq=900 core_freq=333 sdram_freq=450 over_voltage=2 and increase memoty for gpu gpu_mem=256 |
Save changes in nano with Ctrl+X, answer 'Y', and then do this:
|
1 2 3 |
sync mount /flash -o remount,ro reboot |
Reboot it's need for apply new overclock options.
Note: It's generally a good idea to keep the core temp below 70 degrees, and the voltage above 4.8V.
To monitor the Raspberry Pi's temperature, look at:
|
1 |
/sys/class/thermal/thermal_zone0/temp |
To monitor the Raspberry Pi's current frequency, look at:
|
1 |
/sys/devices/system/cpu/cpu0/cpufreq/scaling_cur_freq |
Disable Unwanted Services:
Menu -> System -> Settings
Webserver
Allow control of XBMC via HTTP [ ]
Disable Tag Reading:
This is one tweak I will strongly recommend if you have tons of music and your Raspberry Pi plays music
from a remote server wirelessly. Initial loading can take several minutes.
Therefore, I recommend disabling music file tag reading.
Music – Settings – File lists
Enable tag reading [ ]
Disable Actor and Video Thumbnails:
Videos – Settings
Library
Download actorthumbnails when adding to library [ ]
File lists
Extract thumbnails and video information [ ]
Note: Keep in mind a thumbnail has to be extracted only once per video as XBMC uses the cached image from the next time.
Disable Weather Info & Recent Videos and Albums:
Menu -> System -> Setting -> Skin
Home windows Options
Show weather info [ ]
Show Recently added Videos [ ]
Show Recently added Albums [ ]
Disable Fanart:
Menu -> System -> Setting -> Skin
Background Options
Hide Background Fanart [x]
Hide Fanart in full screen visualization [x]
Show Background "Now Playing" Video [ ]
Show Background "Now Playing" Visualization [ ]
Minimize Stuttering and Buffering Issues:
XBMC 13 Gotham with improvements to address buffering issues on Raspberry Pi.
In my opinion this is also one of the must do Raspberry Pi OpenELEC tweaks.
This basically involves creating or editing the advancedsettings.xml file to add the code below.
If the file does not exist one has to be created.
Path: /storage/.xbmc/userdata/advancedsettings.xml
<!– http://kodi.wiki/view/HOW-TO:Modify_the_video_cache –>
<advancedsettings>
<network>
<buffermode>1</buffermode>
<cachemembuffersize>41943040</cachemembuffersize>
<readbufferfactor>3.0</readbufferfactor> <!– Comment: Default is 1.0 –>
</network>
</advancedsettings>
|
1 |
<strong style="font-family: sans-serif, Arial, Verdana, 'Trebuchet MS'; line-height: 1.6;">Note:</strong><span style="font-family: sans-serif, Arial, Verdana, 'Trebuchet MS'; line-height: 1.6;"> <cachemembuffersize>0</cachemembuffersize> enable buffering to SD card, so them</span> |
increase the writes to the SD card.
Advanced Settings:
wiki: http://kodi.wiki/view/advancedsettings.xml
Path: /storage/.xbmc/userdata/advancedsettings.xml
<advancedsettings>
<loglevel hide="true">-1</loglevel>
<playcountminimumpercent>95</playcountminimumpercent>
<nodvdrom>true</nodvdrom>
<videolibrary>
<cleanonupdate>true</cleanonupdate>
<importwatchedstate>true</importwatchedstate>
</videolibrary>
<videoscanner>
<ignoreerrors>true</ignoreerrors>
</videoscanner>
<video>
<timeseekforward>15</timeseekforward>
<timeseekbackward>-15</timeseekbackward>
<subsdelayrange>240</subsdelayrange>
</video>
</advancedsettings>
penELEC – Install DVBlink plugin
– download latest DVBlink XBMC PVR Addon for Raspberry Pi (1.9.6)
http://forum.dvblogic.com/viewforum.php?f=66
– Menu -> System -> Settings -> Add-ons
Install from zip file and select dvb link file
– Menu -> System -> Settings -> Add-ons
PVR Client -> Configure
Server Address: DVB Link server IP address
Server Port: 8100
PVR Client -> Stream
Enable Timeshift [x]
Note: DVBLink make server-based timeshifting for DVBLink XBMC PVR addon
Location of temporary file is created in <dvblink>/share/temp directory on DVBLink server
Max size is currently set to 4GB per client
Best ist creating on server RAM disk for this timeshift
Note: Change default timeshift path can by done by addin timeshift_path key to the root of
dvblink_configuration.xml, for example:
<timeshift_path>T:\dvblink</timeshift_path>
Beware that all files inside this temp folder will be automatically deleted by DVBLink.
PVR Client -> Advanced
Show information messages [ ]
– Menu -> System -> Settings -> Live TV
Enabled [x]
OpenELEC – Install hyperion plugin
Connect to RPi via SSH (root/openelec) – we can user PuTTy to connect
Install hyperion
|
1 2 |
curl -L --output install_hyperion.sh --get https://raw.githubusercontent.com/tvdzwan/hyperion/master/bin/install_hyperion.sh sh ./install_hyperion.sh |
Download HyperCon.jar from https://github.com/tvdzwan/hyperion/wiki/configuration
and run it with command: java -jar HyperCon.jar
Set these parameters:
Hardware
Device
Type: LPD8806
Output: /dev/spidev0.0
Baudrate: 250 000
RGB Byte Order: BRG
Construction (My settings is – Top 38 / Left/Right 22 / Bottom 36 = 38+22+22+36 = 118 leds)
Direction: counter_clockwise
Led in top corners: true
Led in bottom corners: false
Horizontal #: 36
Vertical #: 22
Bottom Gap #: 0
1st LED offset: 59
Image Process
Horizontal depth [%]: 5
Vertical depth [%]: 6
Horizontal gap [%]: 0
Vertical gap [%]: 0
Overlap [%]: 0
Blackborder Detector: Off
Blackborder Threshold [%]: 1
Process
Frame Grabber [x]
Width: 64
Height: 64
Interval [ms]: 100
Smorthing [x]
Type: Linear smoothing
Time [ms]: 200
Update Freq. [Hz]: 20
Save configuration into XML by click "Create Hyperion Configuration"
Upload hyperion.config.json
Upload hyperion.config.json into /storage/.config/
But before you do that, you need to make sure that there is one section added (if already exists, should be modified).
In the “effects” section you should add/modify path to reflect right OpenELEC directory.
"effects" :
{
"paths" :
[
"/storage/hyperion/effects"
]
},
Now it is time to upload the config file.
With SSH enabled you can use SCP to access the OpenELEC SD card.
Copy with Total Commander or FAR manager.
Testing
You can test if all work fine with these commands in SSH:
|
1 2 |
/storage/hyperion/bin/hyperion-remote.sh --priority 50 --color red --duration 5000 /storage/hyperion/bin/hyperion-remote.sh --effect "Rainbow swirl fast" --duration 3000 |
Restart Hyperion:
|
1 2 |
killall hyperiond /storage/hyperion/bin/hyperiond.sh /storage/.config/hyperion.config.json </dev/null >/dev/null 2>&1 & |
Tips & Tricks
Take screenshot of OpenELEC window:
Do it over SSH with this command:
|
1 |
xbmc-send --host=127.0.0.1 -a "TakeScreenshot" |
With keyboard connected just press the "Pring Screen"
Screenshots are stored in Folder /storage/Screenshots
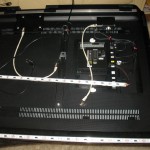
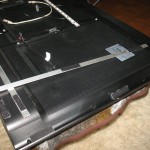
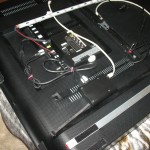
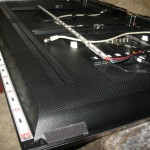
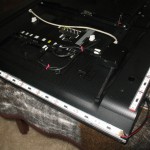
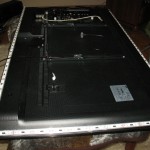
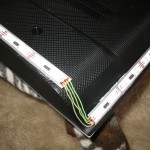
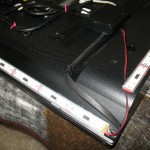
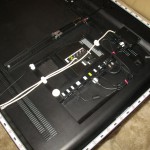
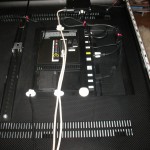
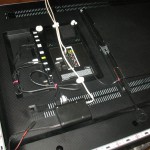
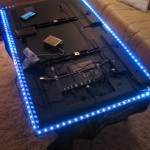
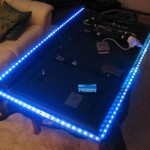
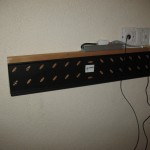
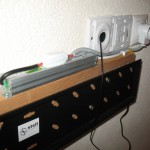
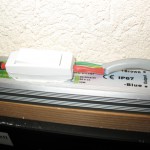
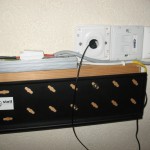
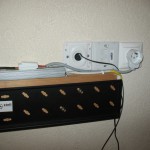
Here are some images about build it:
And here is video about testing it:
